Showing posts with label baking. Show all posts

Thursday, 28 February 2013

You sweet little....er...tart


So last month I blogged about an amazing local strawberry and fresh produce farm and how delish there ice creams were!

I also promised to blog about a strawberry tart with the berries that they sold.

Unfortunately for me I left it a little late and they no longer were in season :-(
BUT! I fished around and managed to get two punnets from a supermarket to make my delish Nectarine, Vanilla Strawberry Tart.

So what brought the idea on was my fave cake makers (City Cake Co.) had this exquisite strawberry tart that wanted, but again I was too late to order it.
So using what initiative I had I decided to make one and here's my little outcome which I'm sure will activate some cravings :-)


The colours really POP!
Added some cachous in the middle to make the tart look almost like a flower :-)
This is extremely easy to make as well.
All you need is:

Shortcrust pastry
1 egg for smoothing over the pastry
baking paper

Vanilla Creme:
4 egg yolks
100g Caster Sugar
25g plain sifted flour
1tsp vanilla extract
1 1/2 cup of butter milk
x2 cups of dry rice or cooking beans

Method:
Preheat oven to 180degrees, line the tin with butter and then lay the shortcrust pastry in line with the tin but not so the pastry is sticking out over the edge.
Brush the egg over the pastry and then lay the baking paper down and pour the two cups of rice or beans as so it bakes evenly.
Bake for 6-10mins then allow to cool.
While that is taking place to make the vanilla creme, beat egg yolks, sugar and flour until smooth in a bowl.
Then place vanilla and milk in a pan, heat gently until almost boiling then pour  into the egg yolk mix whisking as you go.
Return the mix back into the pan and stir over medium heat until it starts to simmer then beat mix well to remove lumps then simmer for a further 2mins.
If you can, remove the shortcrust form the tin and place on a plate.
Remove from heat and cover with cooking paper so it doesn't form a film and allow creme to fully cool.
Once cooled, fold in 2tablespoons of buttermilk then spoon mix onto the pastry.
Arrange berries or other fruits on top and serve with a side of ice cream/cream and devour!

Piece of cake!
Well in this case, tart :P

I had to stop myself from eating it, it was so delicious!
It's even nice just eating it on it's lonesome :-)

So do you have any new treats that you've baked up lately that you absolutely swear by?
I'd love to hear it!

Cheers for reading :-)

XOXOX

Monday, 22 October 2012

Baking, New Shoes & Pinterest

Kia Ora Everyone!

Just in case you're not a Kiwi, that means "Hello" and/or "Thank You" in Maori :-)

Before I go any further I would like to apologise for my absence and also welcome my newest followers!

Since my last post alot has happened!
One, I've finally landed a job (chicka chicka YEAH!).
Two, I baked today :-)
Three, have a new pair of shoes which I'm stoked about!
And four, I'm on Pinterest! (a tad late on the bandwagon, but hey I made it!). 

So to start my first post for October, even though the month is nearly over, will be with what I baked today.

I saw a picture of this on Pinterest:

FOOD PORN!

And can I say that I fell in LOVE with what I was seeing!
The name for this is Cinnamon & Sugar Pull-Apart bread; I Googled a recipe for this immediately and came across this website called 'Recipe Snob' - very appropriate name :-)

I found the recipe's method very easy to follow, I will advise, though, that you add at least double (X2) to what is shows on the ingredients as I didn't find mine to be enough.

And also to add more flour as the dough is incredibly sticky!

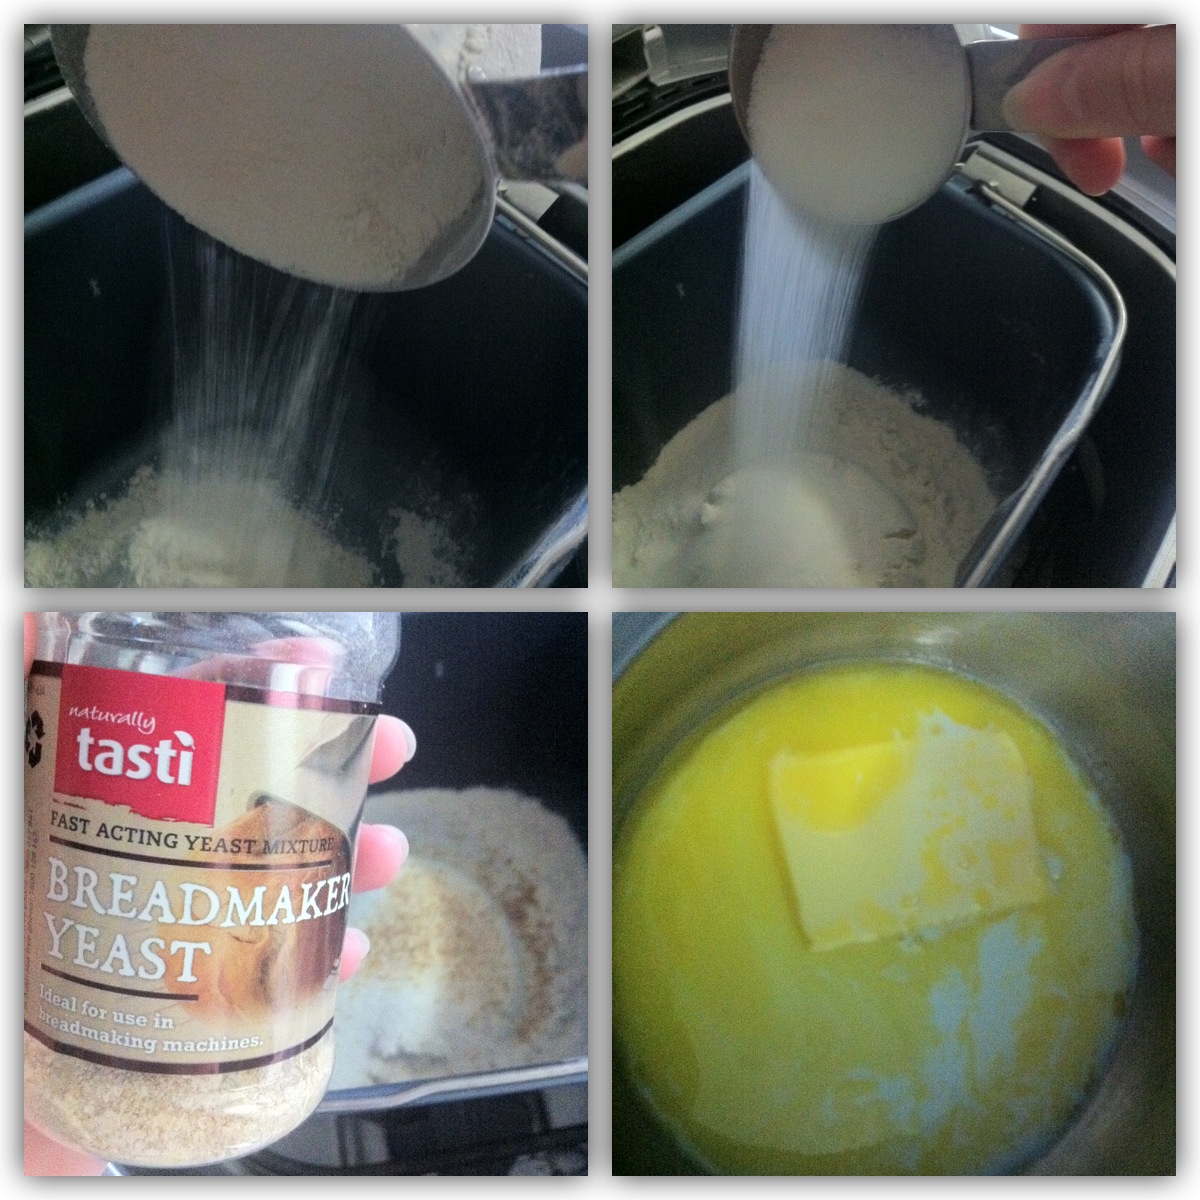
Here is my step by step procedure, going via the link by Recipe Snob:


Final outcome! And it pulls apart!

The outcome was amazing!
Although mine didn't turn out exactly like the websites did, I was still pretty happy :-)
They were delicious served with a side of ice cream and pulled apart as the name suggests, I recommend you give it a go!

This, along with many other treats, will be on my Christmas menu. I'll post about those later.

Part two of my October post is that I finally got a job!
It's at this amazing NZ shoe company called Overland Footwear :-)

And as part of me joining the team I am to represent the company by wearing their product.
As were heading heading into warmer months here in NZ, I chose these stylish and comfy red wedge heels!


The shoes are from one of the many brands we accommodate called Isabella Anselmi, which is named after the founders daughter.
I can't begin to say how comfy they are!

They have cushy padding, and are made with leather upper and lining (there is leather on the inside of the rainbow elastic so there is no rubbing).
I love the red colour too. My current shoe collection consists of earth tones E.G. Black, nude, white, brown... So adding the red really gives my collection a POP of colour! 

They would look great with any outfit too; which I'll be sure to update you on that soon and also the 'God-send' products the company sells....

I'm a huge shoe addict as well so working here is a dream but also very dangerous!
Last, but not least......
I HAVE FINALLY JOINED PINTEREST!

I've been on a month and bit now and I am ADDICTED!
It's so hard not to get carried away, there are so many things you like that people are pinning that you just have to as well!

You can check me out here. I pin anything and everything from food, home decor, fashion, makeup you name it!
You wont be disappointed and I follow all my followers back :-)

So that is all me for my first October post.
I'll be back again soon and I hope you enjoyed reading my life story LMAO!

XOXOX

Friday, 28 September 2012

Slutty Brownies!!!

Now that I have you're attention (ha ha!) I would like to share with you, my lovely followers, a recipe I came across yesterday for cookie dough, Oreo cookie and brownie batter mix erm....brownies aka Slutty Brownies!

You've probably heard the term before, seen the pictures, and drooled uncontrollably!
If you haven't, well my friend you are in for a treat!

Image provided by Google

Hungry yet?

I was so bored yesterday and I've been wanting to make these forever!
I had all the ingredients I needed in my cupboard so off I went into the unknown!

I'm making this sound like an epic journey! And I have every reason, I'm usually a terrible baker so I was terrified that these might turn out really crappy.
Anyway I picked my balls up and went for it!

Here's my ingredients that of course I didn't come up with but found on the Kevin & Amanda website HERE.
I noticed that used a choclate fudge brownie batter. Unfortuantely I didn't have that; but I did have a good brownie batter reciepe from Nestle:

100g butter, softened
1 cup of sugar
1/2 cup of baking cocoa
2 eggs
1tspVanilla extract
1/3 cup of plain flour
1tsp baking powder

  • preheat oven to 160degrees
  • melt butter for 30seconds and then stir in the baking cocoa thoroughly. Let it cool slightly then beat in the eggs, sugar and the vanilla extract.
  • Sift the flour and baking powder together. Add into the mixture and stir until thoroughly mixed then spread on top.
This recipe is insanely good and below are some pictures I took of my process:


Step one: Cookie dough to line the bottom.
I found that quite hard to do inside the dish, so what I did first was line the dish with the cooking paper and then take it out and spread the batter from what I got of the outline then placed it back into the dish.

Step two: Place on top the Oreo cookies.
Just a tip, place two layers of Oreo cookies, I felt one wasn't enough, and this dessert is all about layering!

Step three: I had left over cookie batter so I spread that on top of the oreo's.

Step four: Spread over the brownie batter mix and bake!

After 45 mins of baking on low 160degree heat, here's how mine turned out

Burnt just around the edges, moist and smelt absolutely fabulous!
LAYERS!
SCRUM-DIDDLY-UMTIOUS!

Oh mi gosh HELLO SEXY!


So that's how mine turned out after 45mins :-)
The first three were straight out of the oven and the two you see above were from sitting over night so there not as gooey and chewy.
But that's not a problem, just put them in the microwave for 30seconds to 1min and serve with a side of ice cream and get ready to say '"COME TO MOMMA!".

They taste absolutely delicious, and I decided when I make another batch I'll add marshmallows in between the Oreo cookie layers.
You can get really creative with this and my biggest tip is the more layers the better as it adds more to the 'SLUT' appeal haha :D

Hope this post gave you some inspiration, I was surprised at how well these turned out for me and I can expect it'll do the same for you so definitely give it a go!

Cheers for reading and here's another picture of my brownies for good measure ;-)


XOXOX